Bonjour! How are you doing? Well as promised I’m back and a lot sooner than three months this time. Today is a very wet and cold day here in Perth and while I’ve managed to do a little work on my latest project it really is freezing cold in my studio that has no heating in it, so I’ve decided to take a break and write instead.
Today I thought I’d share why I love using Annie Sloan’s gold leaf to give my revamps some bling. While gold leaf isn’t overly tricky to work with there are a few things to understand about the process and lets just say, don’t have your air con running while using the loose leaf or you’ll have bits blowing everywhere as I found out with the very first piece I ever used gold leaf on. Before I go into the basics of how to use gold leaf I’ll share with you a few reason why I love it so much.
First of all, certain pieces of furniture have a lot of detail on the legs or the edges and quite often design patterns on the fronts of drawers and doors. Legs are usually turned on a lathe which is an amazing skill to have and I’m always in awe of woodworkers and their craft and have a true love and deep respect for the work they do. Drawer fronts are designed in several different ways and quite often they’re made from a separate piece of wood and the adhered to the main front of a door or drawer. This usually means that because it’s two separate pieces, if a decorative detail becomes ‘outdated’ (and honestly that is in subjection to design trends and personal opinion. I tend not to follow trends but go with what I truly like) it’s then easy to remove it and makes a piece a little more modern again.
Quite often you’ll notice that these design elements (carved legs, decorative drawer fronts) appear to get lost when a piece is in its natural timber state or when it has been painted in one solid colour. You can see the features are there but quite often you have to look very closely to get a good look at them. I personally find that if a piece has gorgeous details then I want to see them as I’m looking at it and I don’t want to have to get too up close and personal to get a decent look.
This is where I love using gold leaf, not only does it bling a piece up and create some luxe, it brings those carved details and workmanship to life and makes them pop. I’ll share a couple of examples of my work where the pieces are in their original state and then after gold leaf has been applied. Now keep in mind it all comes down to personal taste and some people love the timber look and think it should be left in it’s natural state. Then you have others like me who like to add some colour and drama to a piece which can take it from ok to wow!
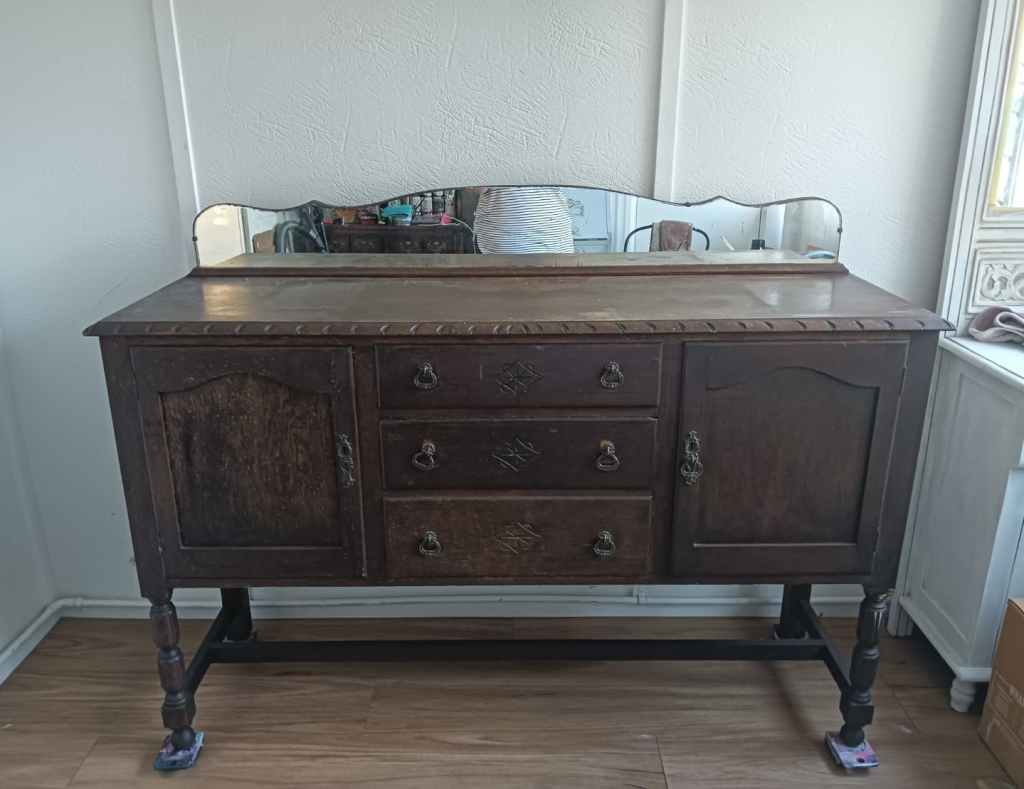
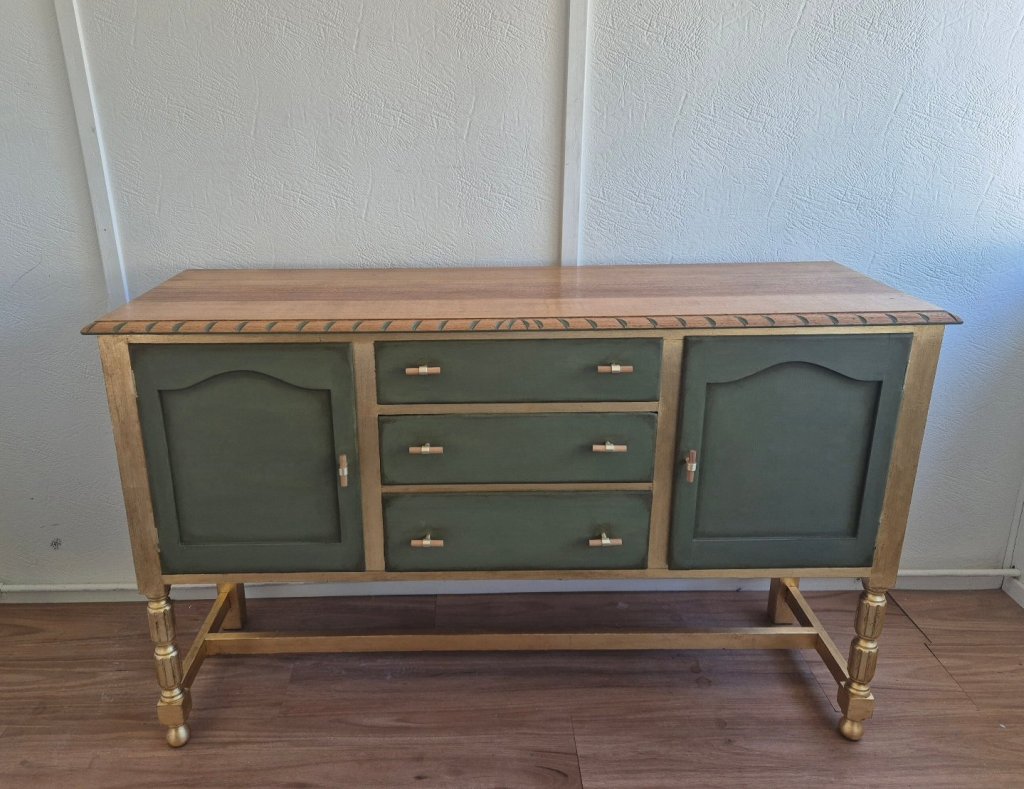
My green and gold buffet is one of my favourite pieces and one of two pieces where I’ve used a lot of gold leaf. If you look at the difference between the two pictures you can see the details on the legs are much more noticeable than in the first picture.

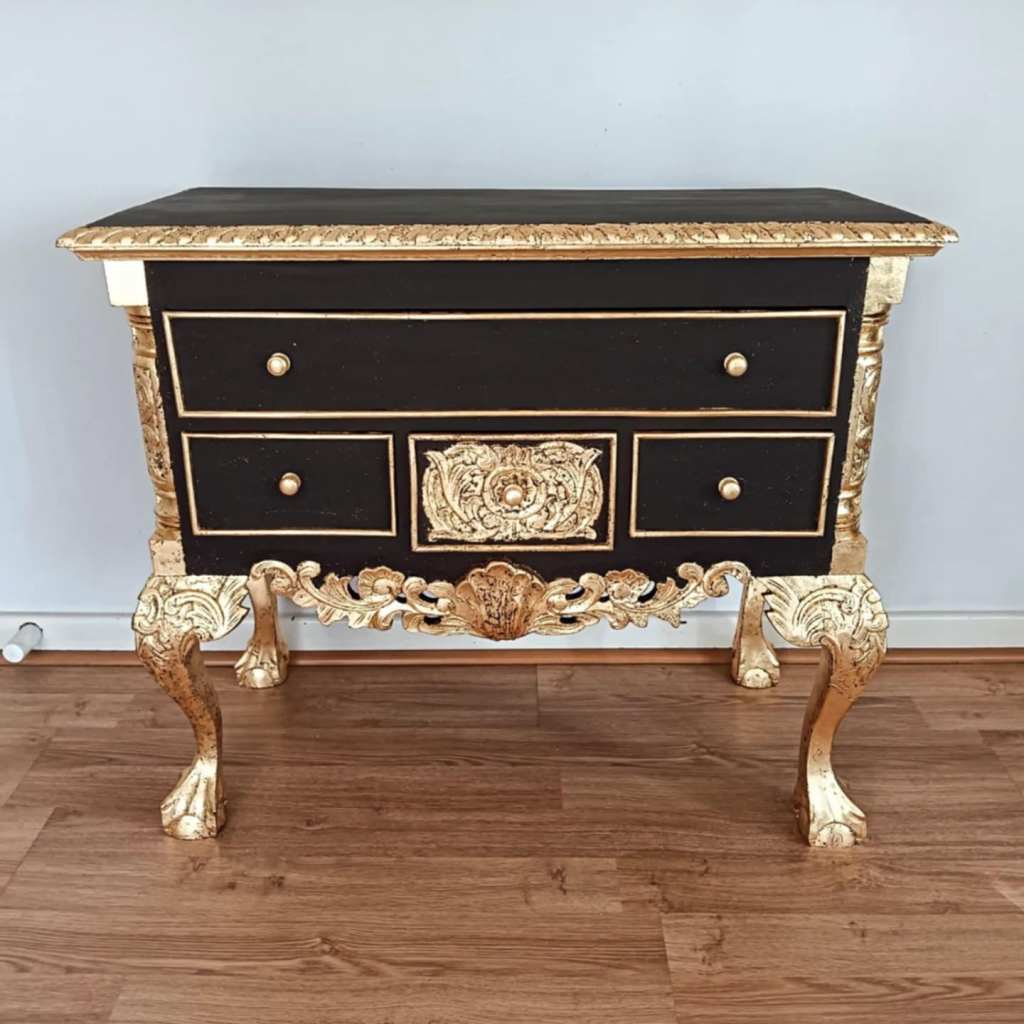
This black and gold piece is my all time favorite piece and was the first piece I ever used gold leaf on. You can see in the first picture, the details are noticeable but in the second picture the gold leaf really brings those details to life and makes you take notice of them. You’ll also notice that between the two pieces the gold has different looks, the first piece looks toned down while the second piece looks very bright. I will explain why that is soon but first I’ll give you a quick run down of the gold leaf process as it’s not too tricky but does require a little patience.
To use gold leaf you’ll need a special glue called gold size glue (I use Annie Sloan’s) an artists paint brush to the size of the area you’re covering, (Don’t use a big brush if you’re leafing a narrow area because where the glue dries that is where the gold leaf will stick to) your gold leaf, a small jar with some water in it and a dry paint brush for brushing off the excess gold leaf.
For now, lets say you’ve already decided where you want to gold leaf. Dip your paintbrush in the size glue but don’t overload the brush or it will run as you apply it. Carefully paint the glue onto the area you’re going to gold leaf and make sure you’ve covered the area thoroughly but haven’t overloaded it with too much size. You can leaf in sections or put the size over the whole piece at one time. However if you decide to size the entire area at once you will want to leaf the piece all at once so no dust, fluff or animal fur ( if you have pets) gets on the size. I personally prefer to work in sections, that way if I need to take a break I can and I don’t need to leave a big section of size unleafed or if I need to go somewhere I can always come back to the piece and finish it later. Both pieces above where done in sections as they required a lot of leafing and a lot of time to get them done.
Once you’ve got your size glue where you want it, you’re now going to have to leave it to dry. Yes, you heard me, it now needs to dry but unlike regular glue size will stay tacky/sticky for your gold leaf to stick to. In summer it can take as little as ten minutes for the size to dry but in winter it could take as long as twenty-five minutes especially on a very cold day like today. To see if your size is ready, gently feel an area with your finger and check to see if it’s tacky or wet. If your finger is wet it needs a longer drying time, if your finger comes away clean but slightly sticks to the piece then it’s tacky and ready to use. Make sure you check a few areas though if you’ve sized a big section as it may be tacky in one spot but still wet in another.
Next comes the fun part, time to adhere the gold leaf to your size. Gold leaf comes in two options, loose leaf and transfer leaf, the difference being that the transfer leaf is adhered to a backing paper that you can easily cut to size and then rub onto your piece. The loose leaf is as it’s name suggests, it’s loose, not adhered to backing paper which means it’s not as easy to cut to size and is best used as one piece on decorative areas. For today I’ll be teaching as if we’re using loose leaf and not transfer but personally I find them very interchangeable.
With your size tacky and ready to go, take your loose leaf gold sheet and lay it over the area you want to cover, then with your dry paint brush gently press it down so it makes good contact with the areas that’s been sized. If your piece has a lot of curves as my second piece did, then nows the time when you can really press the gold leaf into those curves. Don’t worry if it tears as you can simply lay another piece of gold leaf on any areas you missed. Keep going with the gold leaf and paint brush until you’ve covered your area and are happy with how it looks. If you’re working in sections now is a good time to go ahead and size your next area you want to cover, remember to wait until to gold size is tacky though or the leaf will not stick to the glue.
Once you’ve covered the area you want with gold leaf you can then take your dry brush and brush the bits of gold that aren’t stuck to the piece off. Keep brushing until all the loose pieces come away and you’re left with your gold leaf detailed areas. I like to let my gold leafed areas sit for a few hours before waxing with clear wax. One because it gives the gold a chance to really bond with the size and dry completely and two because you may come back to it and realized you missed a spot and if the area is still tacky it gives you a chance to lay down some more gold leaf. Once you’re happy with everything go ahead and seal it with clear wax which will protect it. If gold leaf isn’t protected it will oxidate and and develop a tarnished look so to keep it looking luxe protect it with clear wax. If you don’t want the gold too blingy, you can tone it down with some dark wax over the clear wax. You must use clear wax first though or the dark wax won’t move across the gold leaf and then it becomes quite difficult to correct, so always clear wax first and then dark wax over the top. On the green and gold buffet I have toned down the gold with dark wax as I didn’t want it to be as blingy as the black and gold piece but it’s completely up to you how you want your piece to look.
Now, I know I said you need a jar of water and here is why. Moreso in the warm weather your paint brush that you’re using for the size glue can become a bit gluggy and thick and then the paint ends up with globs in it and on the surface of the piece. We don’t want a lumpy surface on our pieces, so if you find your paint brush is getting thick in winter or summer, then just dip it into the jar of water and give it a good swirl around to remove any excess glue. I tend to keep a dry lint free cloth near me to then wipe off any excess water from the paint brush and then continue gluing my piece.
Gold leafing might seem a bit daunting when you first try it so I suggest starting with a small piece to practice on but once you get the hang of it, it’s a lot of fun and I personally find it like therapy, very meditative. If you need some one on one advice feel free to leave a comment below or send me a message and I’m here to help. Also be sure to come follow along on Instagram and Facebook to see what I’m working on next.
So that is why I love gold leaf, it’s so versatile, it brings a piece to life and gives it glam and luxuriousness as well as brightening up something that was once dull. Personally I think everyone needs a little gold in their life so why not give it a shot. Well that’s all from me today, I’ll be back soon and happy gold leafing.
À bientôt….Michelle x


Leave a comment